[게시판 프로젝트] 뷰 구현(2) - Spring Security를 사용하여 로그인 페이지 구현
2024. 8. 17. 02:48ㆍCS/Spring
Spring Security를 사용하여,
loginController & logoutController를 따로 만들지 않고도
AutoConfig로 로그인과 로그아웃 페이지를 만들어 보자
그리고 개발 중인 만큼 "임시"로
루트페이지에 Spring Security Login페이지가 바로 나오는 문제를
SecurityConfig 클래스를 생성하여
모든 요청에 대한 인증을 여는 방법으로 해결해보자!
build-grade 추가
implementation 'org.springframework.boot:spring-boot-starter-security'
implementation 'org.springframework.boot:spring-boot-starter-thymeleaf'
implementation 'org.thymeleaf.extras:thymeleaf-extras-springsecurity6'
testImplementation 'org.springframework.boot:spring-boot-starter-test'
testImplementation 'org.springframework.security:spring-security-test'- start.io 에서 타임리프와 스프링 시큐리티를 동시에 의존성 추가한다. 아래의 의존성은 2가지가 동시에 추가되었을 때만 생성되는 implementation code이기 때문이다.
implementation 'org.thymeleaf.extras:thymeleaf-extras-springsecurity6'- 스프링 시큐리티랑 타임리프 엑스트라만 뽑아서 build-gradle에 추가한다.
implementation 'org.springframework.boot:spring-boot-starter-security'
implementation 'org.thymeleaf.extras:thymeleaf-extras-springsecurity6'
localhost:8080/articles를 실행
- article이 보여야하는데, local:8080/login이 보인다.
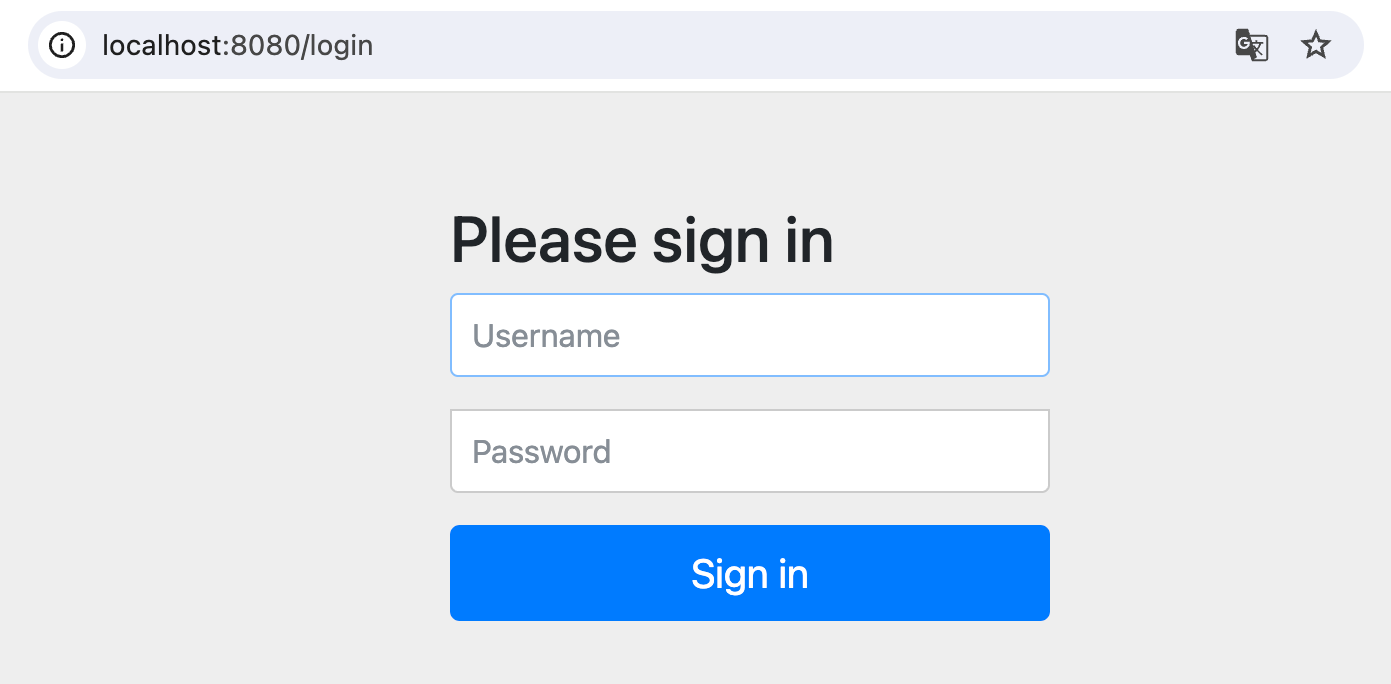
- DefulatLoginPageGeneratingFiler.class 에 들어가 보면, 자동적으로 로그인 페이지를 생성해준 코드가 보인다.
- AutoConfig에 의해서 Security부분이 자동 설정되면서, 위와 같은 페이지가 그려지게 된다.

- 이대로 두면, Security 기능으로 인해 로그인을 하지 않으면, 아무것도 할 수 없고 볼 수 없다.
- 아직 아이디와 비밀번호를 넣고 DB에서 조회하여 인증으로 이어지게 구현을 하지 않았기 때문에 SecurityConfig를 통한 조치가 필요하다.
SecurityConfig

- SecurityConfig 클래스를 생성해 주고, filterChain 메소드를 @Bean 등록해 준다.
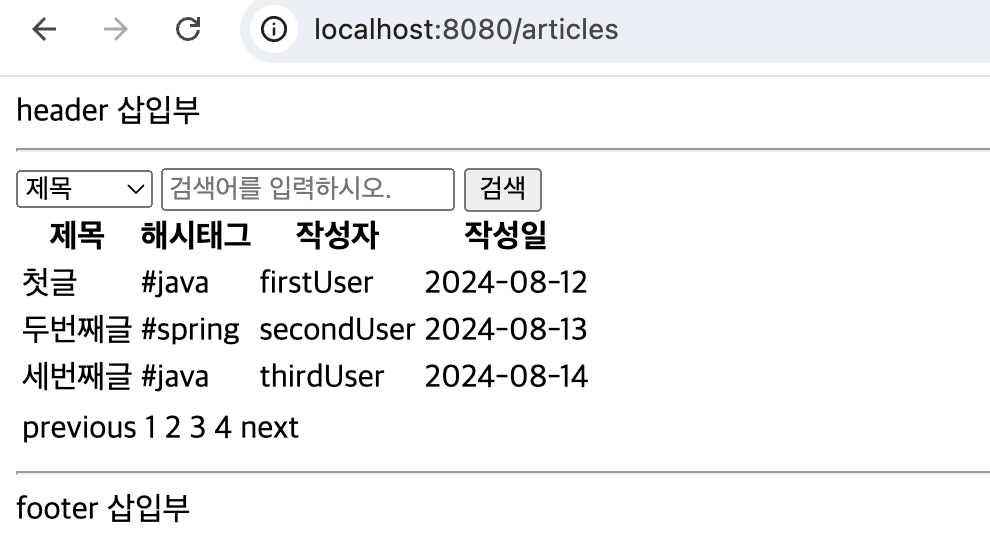
- 다시 localhost:8080/articles 를 실행하면 원래 의도했던 articles 페이지가 나온다.
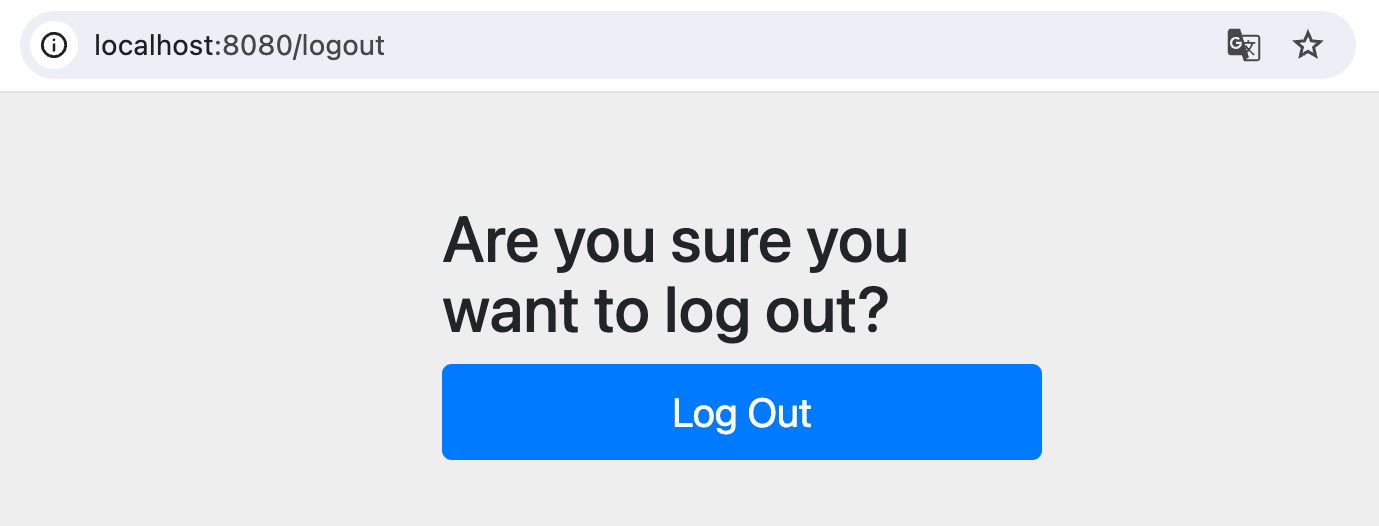
- 하지만, login/logout 페이지는 이미 Spring security에 의해 AutoConfig 되어있기 때문에 실행하면 여전히 페이지가 나옴을 알 수 있다.
'CS > Spring' 카테고리의 다른 글
| [Spring/MVC] Controller, Repository, DTO, Domain, Config의 역할 (0) | 2024.08.26 |
|---|---|
| [게시판 프로젝트] 뷰 구현(3) - Boostrap 프레임워크 라이브러리 사용해서 CSS 적용하기 (0) | 2024.08.17 |
| [게시판 프로젝트] 뷰 구현(1) - 타임리프를 사용하여 게시판/게시글 페이지 구현 (0) | 2024.08.17 |
| [게시판 프로젝트] API 구현(1) - Spring DATA REST를 통해 (0) | 2024.08.16 |
| [게시판 프로젝트] API 구현(2) - Querydsl을 통해서 세부 검색 기능 구현 (0) | 2024.08.16 |